Log in at portal.azure.com and follow the 8 steps.
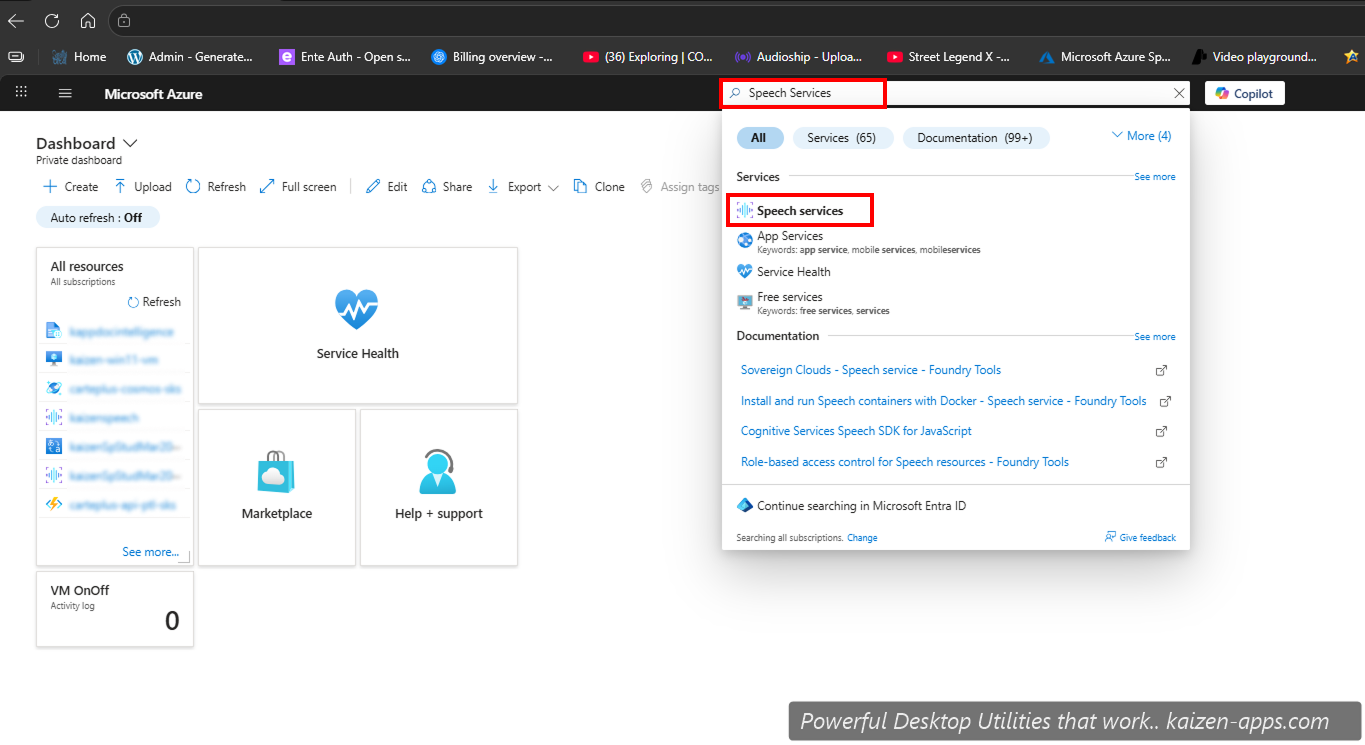
Step 1: Search for “Speech Service”
Click the search bar at the top of the Azure portal. Type Speech Service and pick Speech Service from the dropdown.
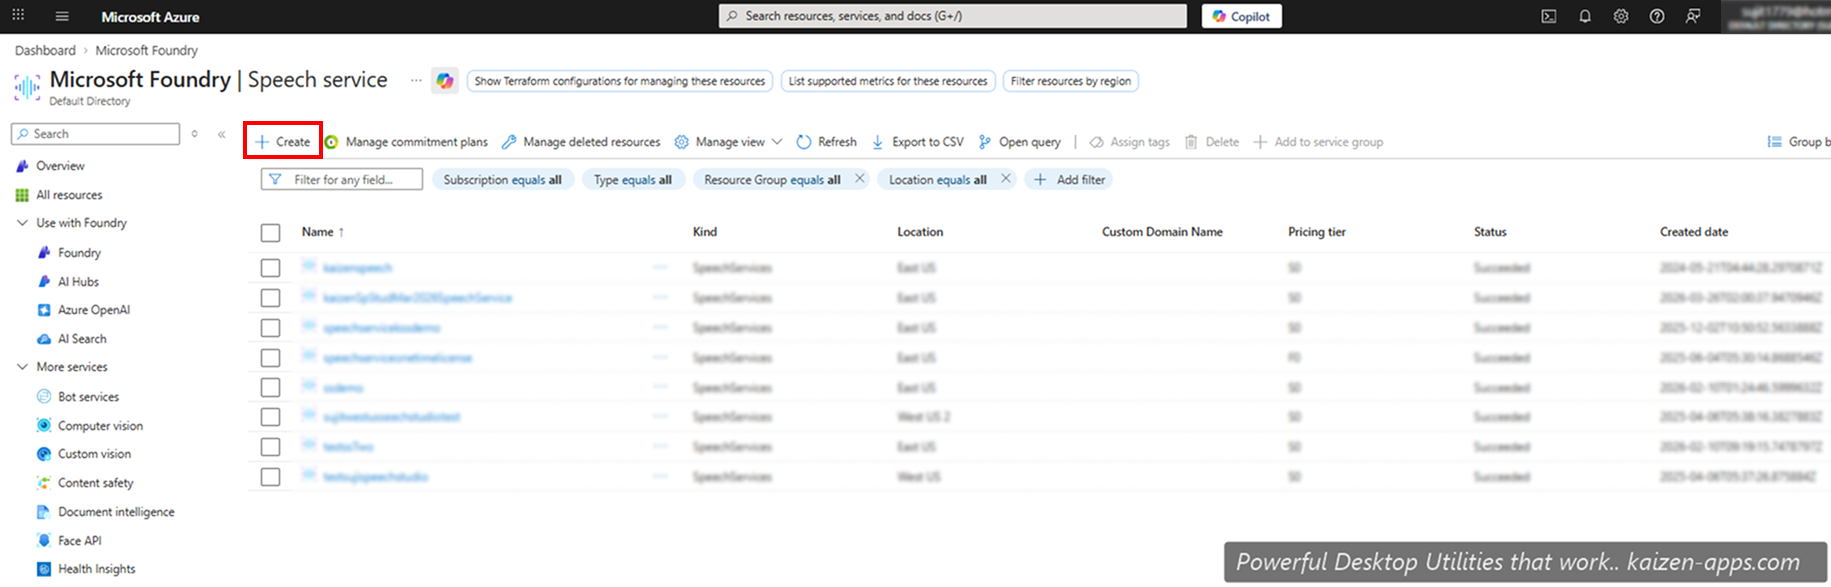
Step 2: Click Create
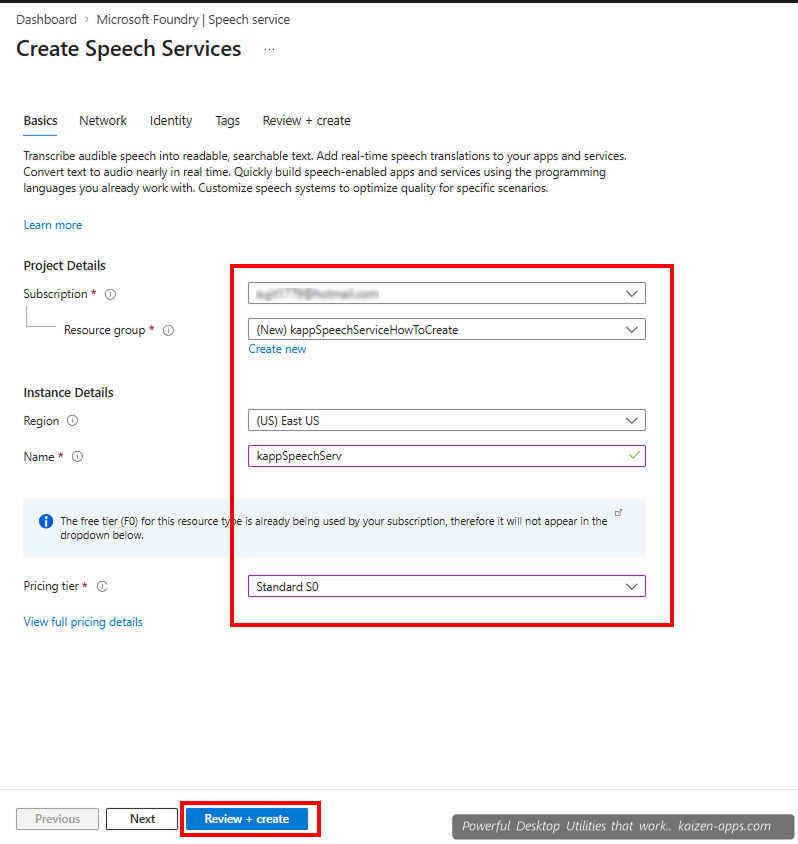
Step 3: Fill in resource details
- Subscription: your Azure subscription
- Resource group: pick existing or create new (e.g.
kaizen-speech) - Region:
East USis required — currently the only supported region for Speech Studio - Name: anything meaningful, e.g.
kaizen-speech-01 - Pricing tier: F0 (Free, 9 hrs/month) or S0 (pay-as-you-go)
Click Review + create.
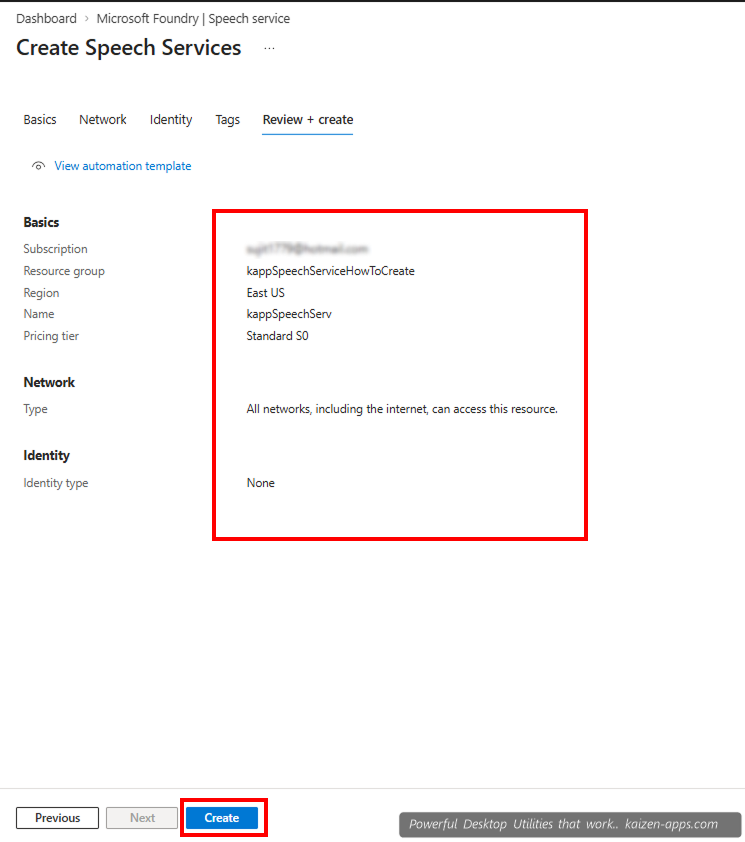
Step 4: Create
Review the summary, click Create. Wait for Azure to provision the resource (usually <60 seconds).
Step 5: Go to resource
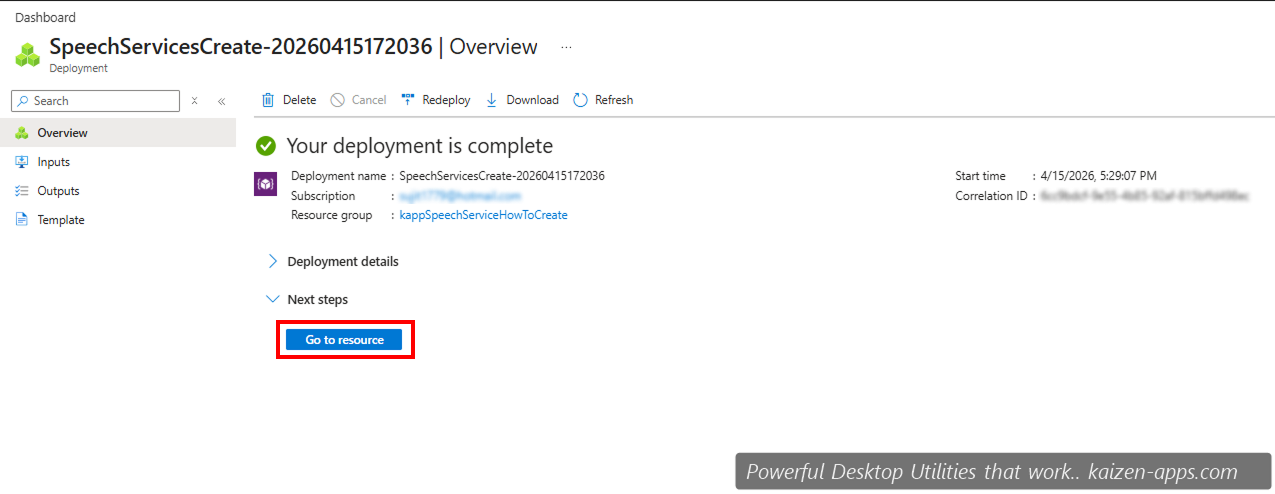
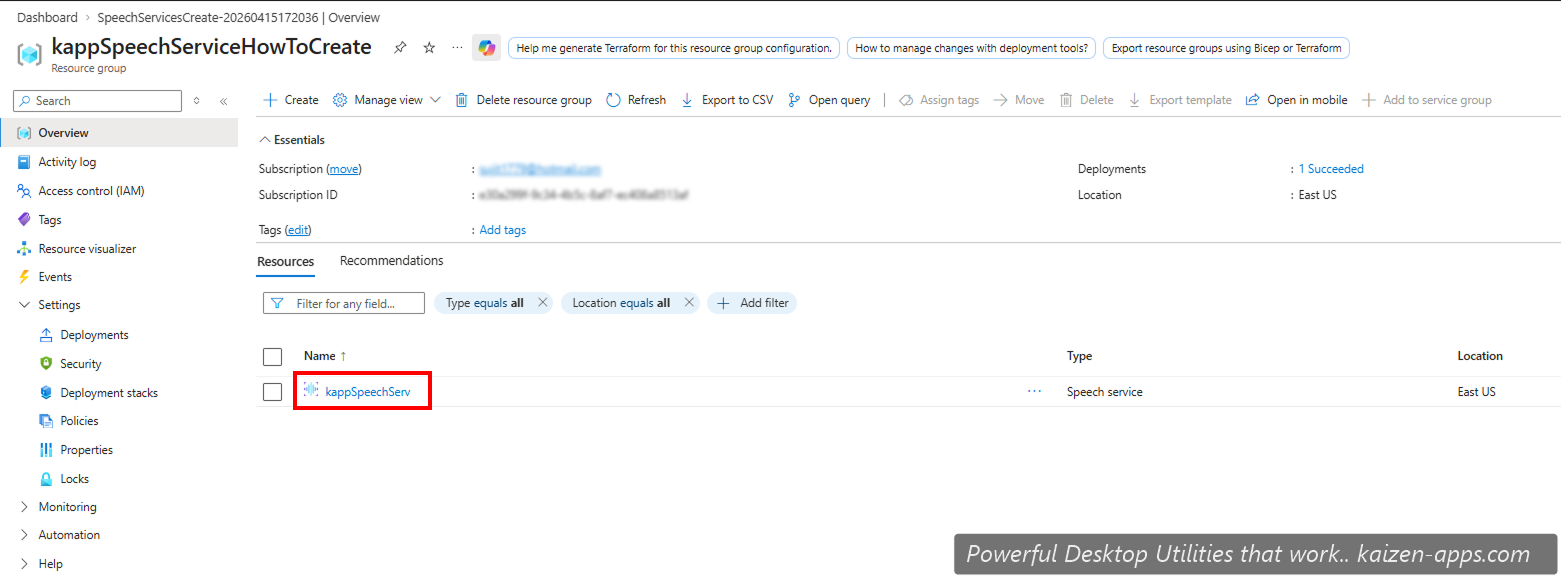
Step 6: Open your resource
If the deployment panel took you to a summary list, click through to your resource.
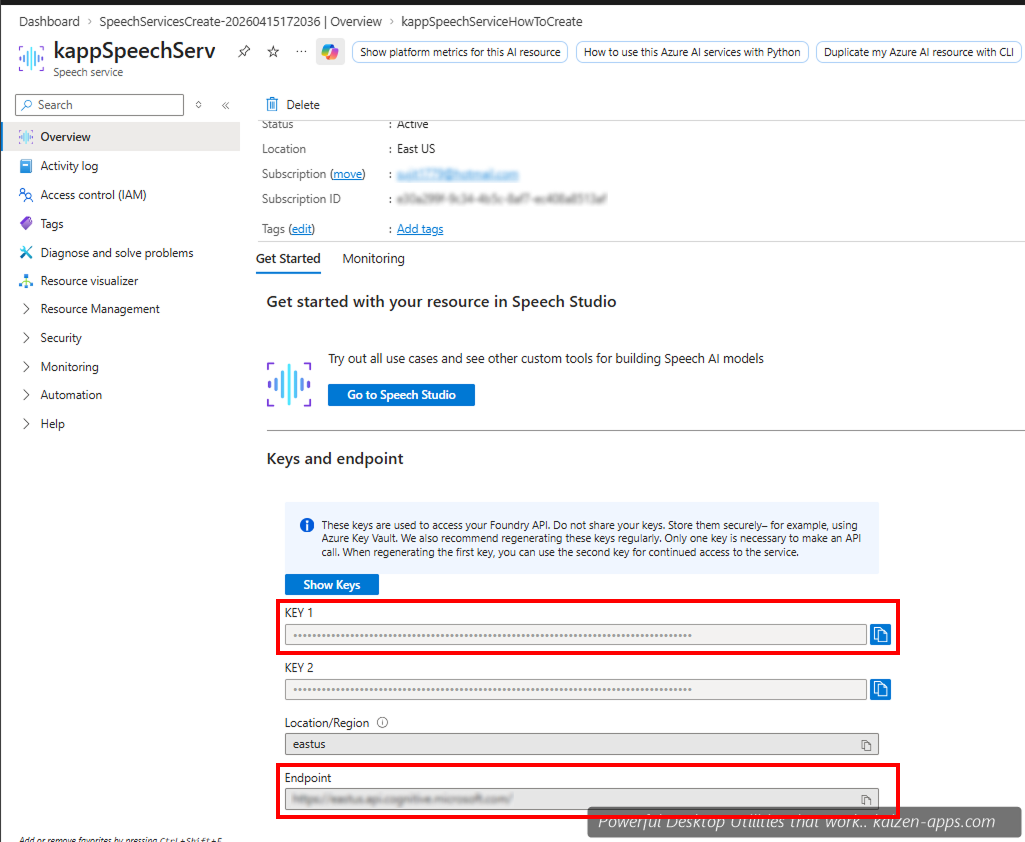
Step 7: Copy key and endpoint
In the left sidebar, click Keys and Endpoint. Copy KEY 1 (or KEY 2 — either works) and note the Location/Region (should be eastus).
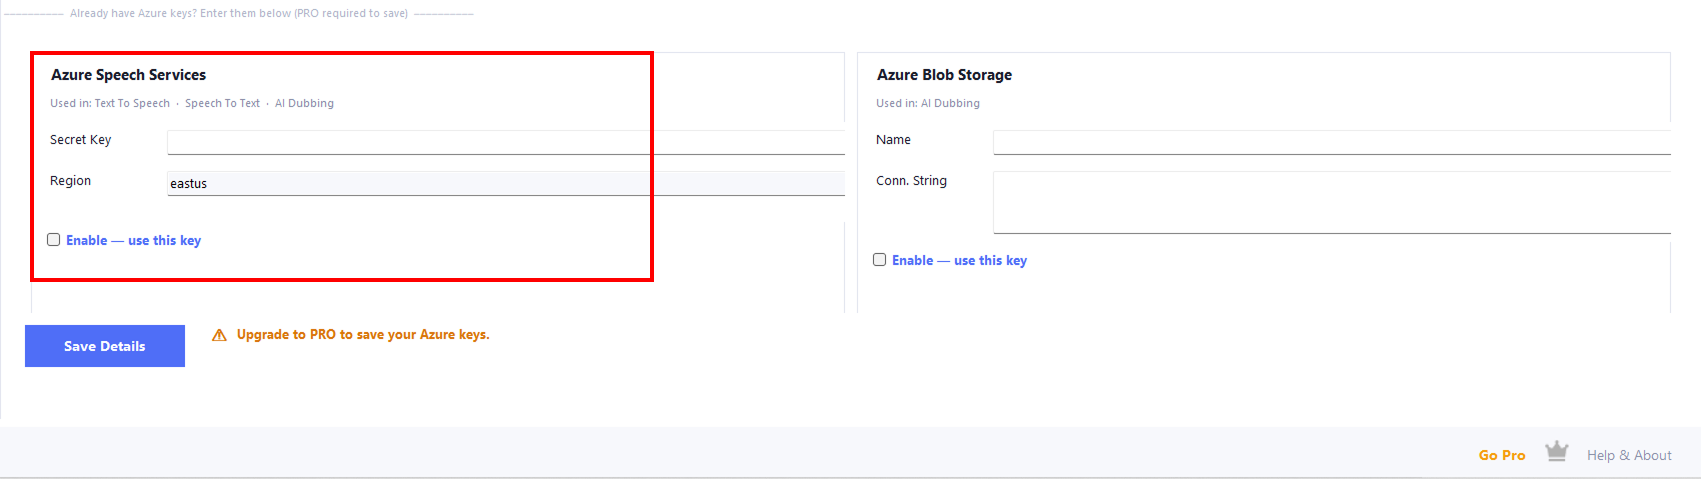
Step 8: Paste into Speech Studio
In Speech Studio, open the Get 9 Hrs FREE / Azure tab. Under Azure Speech Services:
- Paste KEY 1 into Secret Key.
- Region should already be set to
eastus. - Tick Enable — use this key.
- Click Save Details. (Requires Pro license to persist the key.)
Next: Blob Storage (only if you want dubbing)
For AI Video Dubbing, you also need Azure Blob Storage. See the Blob Storage guide.
700+ neural AI voices, transcription and AI video dubbing on Windows — one-time purchase, works offline.
Get Kaizen Speech Studio →Free download