How to Automate App Switch
Follow easy steps below to Automate App Switch
Step 1: Open Application
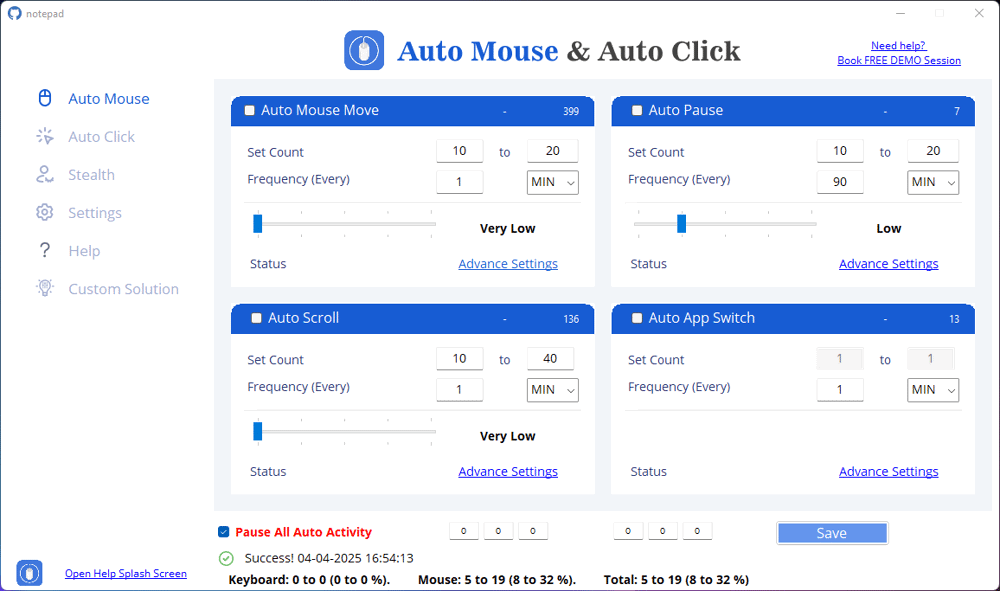
Step 2: Locate the "Auto App Switch" Feature
Find the "Auto App Switch" section in the interface.
Click the checkbox to enable it.
Step 3: Set the Switching Frequency
Choose how often the software should switch between apps (e.g., every 10 seconds).
Use the dropdown menu to select Seconds (SEC), Minutes, or Hours, depending on your needs.
Step 4: Define the Number of Switches
Example: If you set it from 1 to 1, the software will switch only once.
If you set a higher range (e.g., 5 to 10), the software will switch between apps multiple times.
Step 5: Configuring Advanced Settings
4.1. Limiting or Allowing Unlimited Switching
No Limit: The software will continue switching between apps indefinitely.
Limit to [X] Times: You can set an exact number of switches (e.g., 1000 switches).
Reset Option: Clears previous settings.
4.2. Customizing Switch Behavior
Change Tab in Browser
If you enabled it, the software will also switch between open tabs in your browser while switching applications.
Yes: Activates browser tab switching.
No: Only switches between applications without affecting browser tabs.
Move to Random Tab
When you are switching browser tabs, this option allows the software to pick a random tab instead of following a sequence.
Yes: Switches to any random tab.
No: Follows the tab order.
Duration Settings
You can set how long the software should remain in an application before switching to the next one.
Example: If set to 45 seconds, it will stay in one app for 45 seconds before switching.
Step 5: Activating and Running the Auto App Switch
1. Click on the "Save" button to apply your changes.
2. Ensure the "Pause All Auto Activity" option is unchecked.
3. Click Start to begin the automation.


